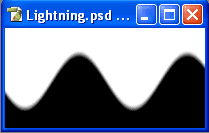
I: Creating the Lightning in an Alpha Channel
- Go to File > New Set the width to = 400pixels and the
height to = 200pixels. Click Ok to create a new image.- Go Window > Layers to make sure that the Layer panel is open. Select the Channel tab at the top of the panel. Click theCreate New Channel icon at the bottom of the Channel panel. A new channel is created named Alpha1 and the work space turns black.
- Press the "D" key to set the default colors in the Color Picker.
- Select the Gradient tool from the Toolbox. Select Linear Gradient from the Options Panel. Click on the Gradient sample to open the Gradient Editor.
- Make a gradient that is half black, half white only. Put the white color on the right side.
- Directly on the Alpha channel drag the cursor from the bottom to the top about 2 inches high. This will create a tight gradient.
- Go to Filter > Distort > Wave. Adjust the settings to create a jagged line that is not too jagget. Hit the Randomize button until you find something you like.
- Go to Filter > Render > Different Clouds.
- Press Control I to invert the image.
- Go to Image > Adjustment > Levels. Move the black trangle at the bottom of the histogram to right side of the slider. As you do the background in the image becomes darker. Do this until the background is completely black.
- You now have a lightning image in an alpha channel.
II: Putting the Lightning into a Layer
- Click the Layers tab to go to the Layer panel and create a new layer above the background layer. Fill the new layer with black using Edit /Fill. Keep the new layer selected.
- Hold down the Control + Al t + 4 keys load the alpha channel as a selection. (You can also click the dotted circle icon in the Channel Panel to Load Channel as Selection. )
- Set the Foreground color in the Color Picker to the color that you want the lightning bolt to be. Press the Alt + Backspace keys to fill the selection with the color.
- To make the lightning bolt thicker go to Select > Modify > Expand and set the width in pixels.
- Make sure that the Background layer is selected. Create a New Layer so that it is above the background layer and Layer 1 with the lightning bolt. With Layer 2 selected load another copy of the lightning bolt in the alpha channel again using the Control Alt 4 keys
- Use the Move tool to move the second lightning bolt off center. Go to Edit > Transform > Scale or Distort to stretch out the selection so that it ends beyond the image window.
- To change the color select a color in the Foreground color Square and use Alt Backspace to fill the selection.
- To add more lightning bolts to the image window repeat steps 5 thru 7.
- To better see your work change the color in the Background layer. Select black for the foreground color. Select the background layer and go to Select > All . Then go to Edit > Fill.
- Save your work.
Copyright © 2007, Christalene Loren. All rights Reserved.


