IV: Blending, Blurring and Thinning the Figures
- Select the Figure Layer. Open the Layer Style drop-down menu from the upper-left corner of the Layer panel. Select Multiply to blend the two layers.
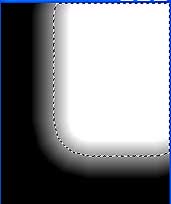
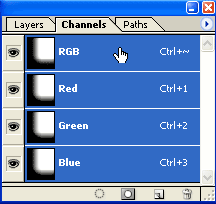
- Click the Eye to turn off the Fig layer. Click the Channels tab at the top of the Layer panel to open the Channels panel. Hold down the Control key as you click on the RGB channel to make a selection in the shape of the bright areas of the image.
- Keep the selection turned on. Click the Layer tab to return to the Layer panel. Make sure that the Fig layer is still selected. Go to Filter > Blur > Gaussian Blur to open the Gaussian Blur dialog box. Set the radius to 7.8 then click OK to blur only the edges of the silhouette within the bright areas of the image. The outline of the silhouette is sharp in the darker areas of the image but blurred where it is surrounded by light.
- Go to Select > Deselect to remove the selection marquee. Go to Filter > Blur > Gaussian Blur to reopen the dialog box. Set the Radius to 3 and click OK to blur all of Layer Fig.
- To Thin the figures, make sure that the Fig layer is still selected. Go to Image > Adjustments > Levels from the menu bar (Ctrl/Cmnd L) to open the Levels dialog box. Set the Input Levels to 0: 1.75 : 83.
- To merge the layers go to the drop-down arrow in the upper right corner and select Merge Down. This merges the layers to a single layer named Layer 1.
II: Adding Color and Texture to the Image
- Click the Default Foreground and Background Color button on the Toolbox to reset the colors. Go to Image > Adjustments > Gradient Map to open the Gradient Map dialog box. Click on the gradient in the Gradient Used for Grayscale dialog box to open the Gradient Editor. This portion (below) is where you are going to create the range of colors for the gradient.
- The Color Stops(short arrows) that are below the gradient bar are used to create a gradient. The Color Stop with the black arrow head is the Color Stop that is selected. To add a Color Stop to the gradient, click anywhere on the lower edge of the gradient bar. Click on the Color sample to change the color. To delete a color drag the Color Stop from the gradient bar. The short arrows above the gradient bar are Opacity Stops and they work the same way but they adjust the opacity between the Color Stops. The Color Stops and their positions on the gradient bar are an approximation of the colors in the final image. When you have completed the construction of your gradient map in the Editor then click OK.
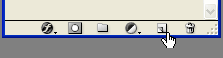
- Click the Create New Layer button at the bottom of the Layer panel. This creates a new layer (Layer 2) above Layer 1.
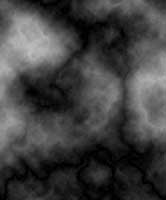
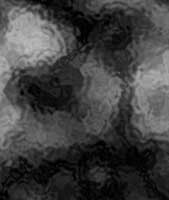
- With Layer 2 selected go to Filter > Render > Clouds. to add a black and white cloud texture to the new layer. Then go to Filter > Render > Difference Clouds to blend another cloud texture on the layer. Use Ctrl/Cmnd F two or three times to reapply the cloud filter creating a more complex cloud texture.
- With Layer 2 still selected go to Filter > Distort > Ocean Ripple. Try setting the Ripple Size at 11 and the Ripple Magnitude at 12. Click OK to apply the filter
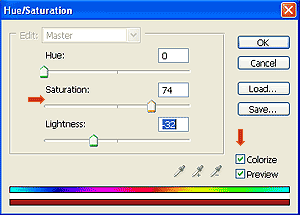
- To make the cloud texture red go to Image. Adjustments > Hue/Saturation (Ctrl/Cmnd U) to open the Hue/Saturation dialog box.
- Click the Colorize box to check it. Drag the Saturation slider until the desired red color appears on Layer 2. There is no reason why you cannot try another color Adjust the Hue and Saturation levels.
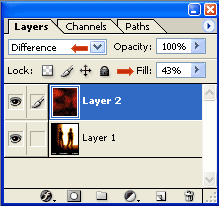
- With Layer 2 still selected open the Layer Style drop-down menu from the upper left corner of the Layer panel. Try Overlay or Difference. Use the Fill slider on the Layer panel to change the fill value. Try 48% with Difference selected.
Copyright © 2006, Christalene Loren. All rights Reserved.