I: Using the Oval and Rectangle Tools
- When either the Oval or Rectangle tools are selected the color options for the Stroke and Fill appear in the Toobar.
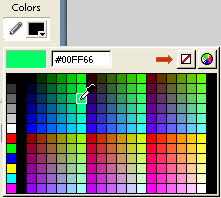
- To select a color click on the color swatch for either the Stroke or Fill. This opens the palette. The cursor becomes an Eye Dropper. Selecting a color from the palette places it into the color Swatch. Clicking the color in the palette closes the palette.
- To create an oval or rectangle without a stroke or a fill select the icon in the upper right corner of the color palette.
- It is recommended to use the stroke only when necessary in order to optimize the Flash files.
- To create a rounded rectangle:
- Select the Rectangle Tool from the Toolbar.
- Select the fill and or stroke colors.
- Click on the Round Rectangle Radius icon in the Options at the bottom of the Toolbar.
- This opens the Rectangle Settings dialog box. Set a value for the corner radius.
- Use the Rectangle tool to draw the shape.
II: Using the Brush Tool
- The Brush tool is located in the Toolbar. You can use the B key to select it. The brush tool is one of the Fill tools in Flash.
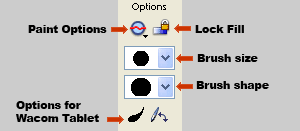
- As soon as the Brush tool is selected the options for the Brush tool appear at the bottom of the Toolbar..
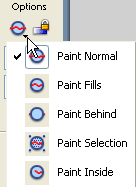
- Clicking the tiny drop-down arrow under the Paint Options icon gives you the following options.
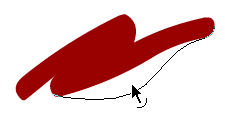
- Select the Brush size and Brush shape. Select the color and begin painting on the Stage. Flash allow you to take the edge of the paint fill and reshape it with the Selection tool.
- When you release the tool the new shape becomes filled with the color.
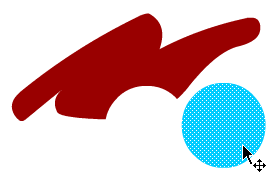
- Fills created by the Brush tool can be used to cut out shapes from other fills.
- To cut out a shape using the Fill tools
- Use the Brush tool to paint something on the Stage.
- Select the Rectangle or Oval Fill tool. Deselect the stroke color. (Click on the box with a red line through it in the color palette.) You can also do this with the Brush tool. Select another color
- Select a fill color and drag the Rectangle or Oval tool over part of the painted area .
- Use the Selection tool to move the circle away from the red painted area.
- Note: Fills are easier for Flash to calculate. Fills make smaller file sizes and take less processing time to render. If you must use line then convert them to fills when you are optimizing your files.
Select the line. Go to Modify > Shape > Convert Lines to Fills.
III: Using the Pencil Tool
- The Pencil tool is next to the Brush tool in the Toolbar.
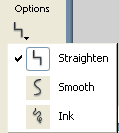
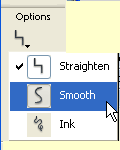
- The Pencil tool has three modes that appear at the bottom of the Toolbar. Click the tiny drop-down arrow to open the menu. The modes are:
Straighten - creates straight line segments that have angles.
Smooth - creates lines that have curves.
Ink - creates free form lines.
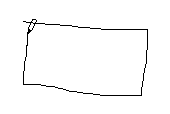
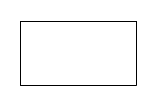
- If you draw a rectangle with the Straighten mode, when you release the mouse Flash cleans up the rectangle.
- If you select the Smooth mode, Flash will also clean up your lines and curved shapes.
- To select the type of line or stroke, go to the Properties Inspector at the bottom of the screen, Selecting custom will give your more options than the drop-down menu.
Note: Flash offers several broken line options but stay away from these unless it is absolutely necessary to have broken or dotted lines in the image. Each line segment must be calculated as a separate object and this greatly increases the file size and rendering time.
IV: Using the Pencil tool to Trace a Bitmap Image
- Open a new Flash file. Go to File > Import > Import to Stage and navigate to the Student folder. Select one of the three images. For those of you coming from outside this course import any solid color image that you wish to trace in Flash.
- Select the layer that the image is located on and rename it "bitmap" Lock the layer.
- Create a new layer and name it "vector". This is the layer that are going to be working on.
- Select the Pencil tool.
- Click the Options arrow at the bottom of the Toolbar and select Smooth.
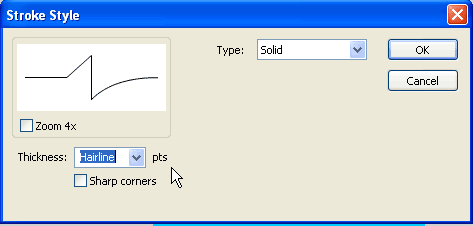
- In the Properties Inspector at the bottom of the screen, select Custom.
- This opens the Stroke Style dialog box. Select Hairline from the Thickness drop-down menu. Make sure that Solid is selected for the Type option. Click OK.
Note: Flash offers several broken line options but stay away from these unless it is absolutely necessary to have broken or dotted lines in the image. Each line segment must be calculated as a separate object and this greatly increases the file size and rendering time.
- Change the stroke color to brilliant green or red or some color that is easy to see.
- Select the View menu. Go to Snapping > Snap to Objects. This forces the line to snap to the edge of the bitmap image.
- Select the Zoom tool in order to magnify your work.
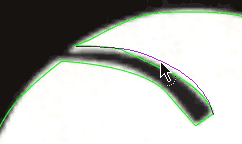
- On the Vector layer begin tracing the outline of the bitmapped image with the pencil tool. Click at every change of direction to create an anchor point. Make broad strokes. Do not try to be exact.
- When you have finished tracing select the Selection tool (black arrow) and begin placing the line on the edge of the image. To adjust a straight line pull at the corner anchor point.
- To adjust a curved line pull in the center of the curve until it conforms to the edge of the image .
- If you break a line or accidentally delete a line, switch back to the Pencil tool to redraw the line segment. When you are satisfied remember to delete any broken line segments.
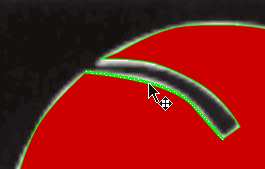
- Select the Fill tool. Select a color and fill inside the traced image.
- The next step is to delete the outline of the filled image. Use the Selection tool to select portions of the outline and use the Delete key to delete them
- When all of the line segments have been deleted the filled shape can be converted into a symbol.
Copyright © 2006, Christalene Loren. All rights Reserved.

